A few years ago, my password manager had a major oopsie. For some reason which I can’t explain, it simply wouldn’t take my master password anymore. One of the passwords stored in my password manager was the BIOS password to my laptop, an ASUS TUF Gaming A15 FA506IH, and I didn’t have any backup of it anywhere.
So I tried the usual steps to resetting a forgotten BIOS password: removing the CMOS battery, pressing Alt-R, and trying bypass passwords, but none of those worked for me. As it turns out, resetting a BIOS password on a laptop is a lot more difficult than on a desktop computer, mostly as a security measure in case the laptop is stolen.
While I thought initially that there was nothing I could do, through some electronics shenanigans, I was able to recover the password. Here’s how I did it.
WARNING: Follow these instructions at your own risk. It is possible to damage your laptop during this process. Only do this on devices which you own.
EDIT 2026-01-27: You might not need to open up your laptop at all. On some devices you can dump the BIOS ROM by running flashrom -p internal -r bios_dump.bin on your laptop itself, and from here you can skip to the “Decrypting the password” section.
Finding the flash chip
The first thing you’ll have to do is open up your laptop and locate the BIOS Flash chip. Most likely, it be in a SOIC-8 or WSON-8 package, but your hardware may be different.
![]() Commonly, the flash chip will have a marking that starts with “25”. Mine had “25Q128FWSF” written on it. Once you find an IC that you think is the BIOS flash, search online for its datasheet.
Commonly, the flash chip will have a marking that starts with “25”. Mine had “25Q128FWSF” written on it. Once you find an IC that you think is the BIOS flash, search online for its datasheet.
 If you find something like this, it’s probably the right chip. However, these chips are different based on what laptop you’re using, so your flash IC most likely will be different. Look up the datasheets of all possible flash IC candidates until you determine which one is the most likely to be the real one.
Dumping the data off the flash chip
In order to extract the password, you need to dump all the data off the chip.
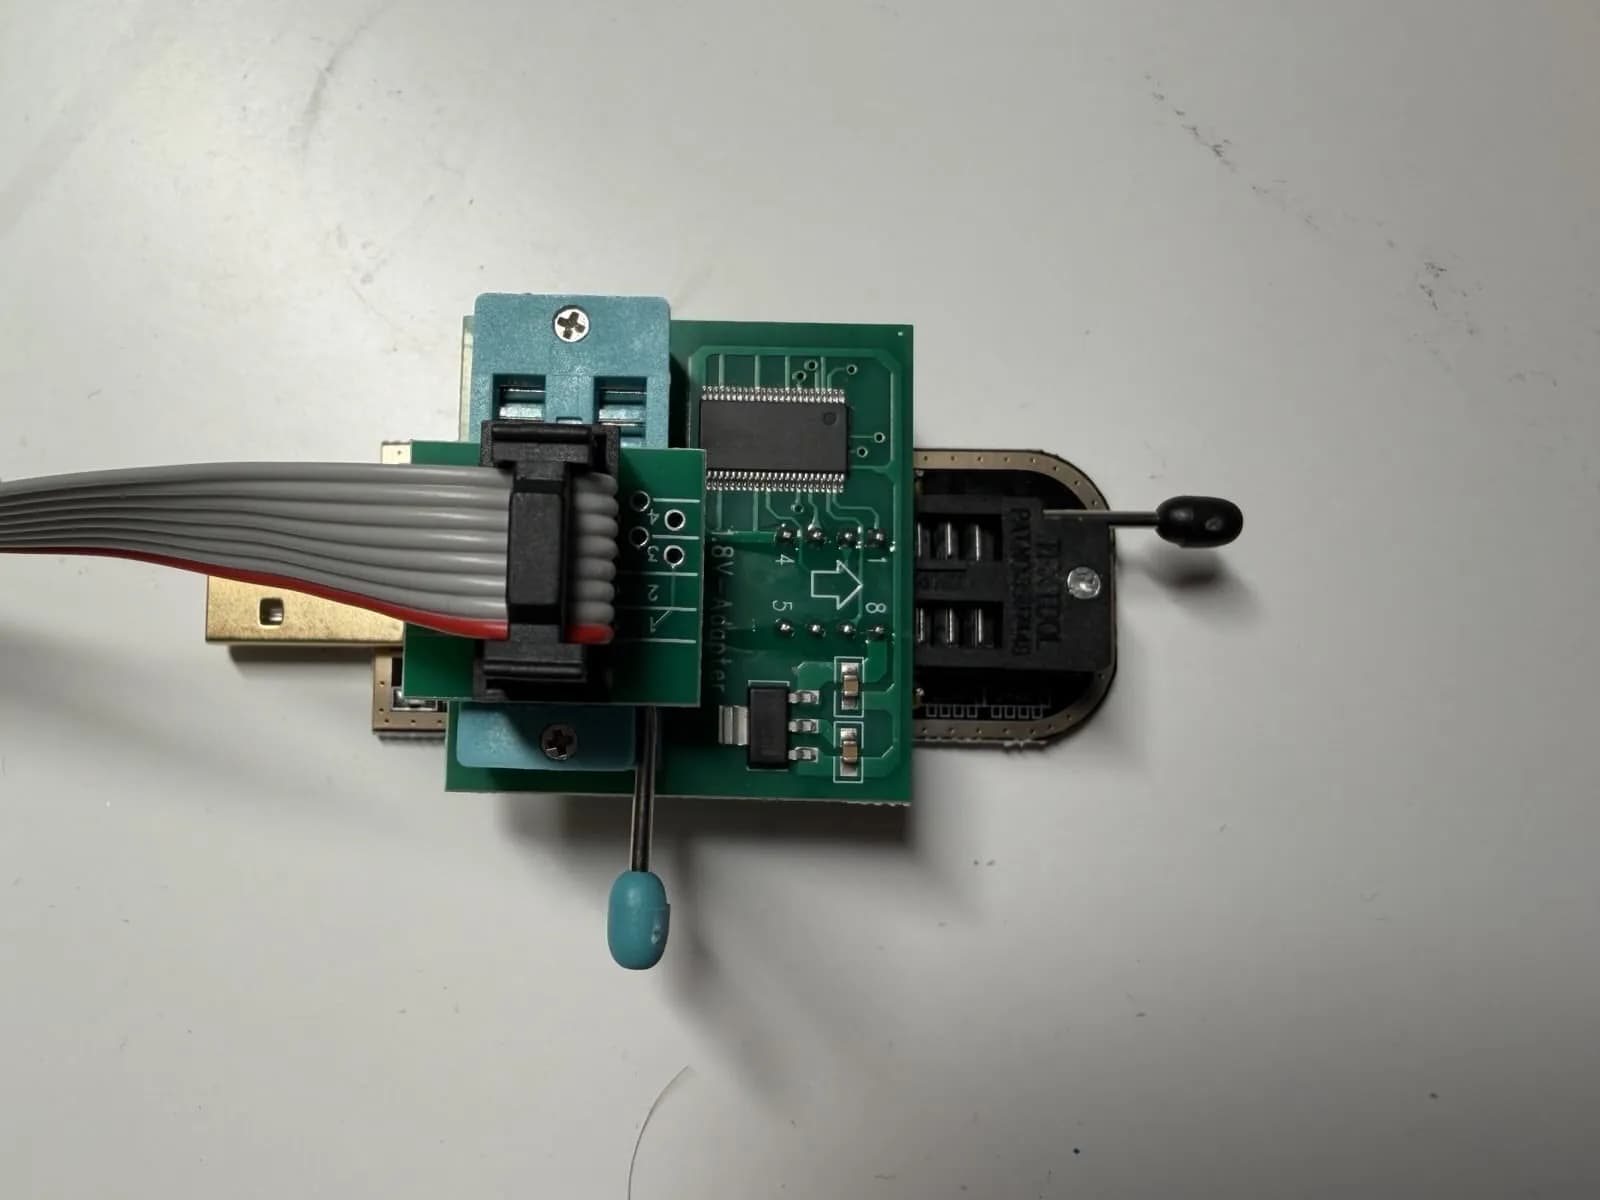
To do this, install flashrom, a utility for reading and writing firmware off flash chips. You’ll also need to buy a programmer. There are multiple programmers available, but the cheapest one is a CH341A, I got mine for around $14 off Amazon. If your flash chip is 1.8V (very common), make sure to also get a 1.8V adapter as well (I bought a bundle with it included). Below is an image of how I put all the things together.
 If you’re using a CH341A and using it with a 3.3V chip, be aware that some models come with a flaw that causes it to output 5V instead of 3.3V which can irreparably damage ICs. Always use a multimeter to check that the voltage is correct before using your programmer for the first time. If your multimeter reads 5V instead of 3.3V or 1.8V, follow this guide to fix it. If you’re using a 1.8V adapter, you should be fine as it should step it down to 1.8V anyway.
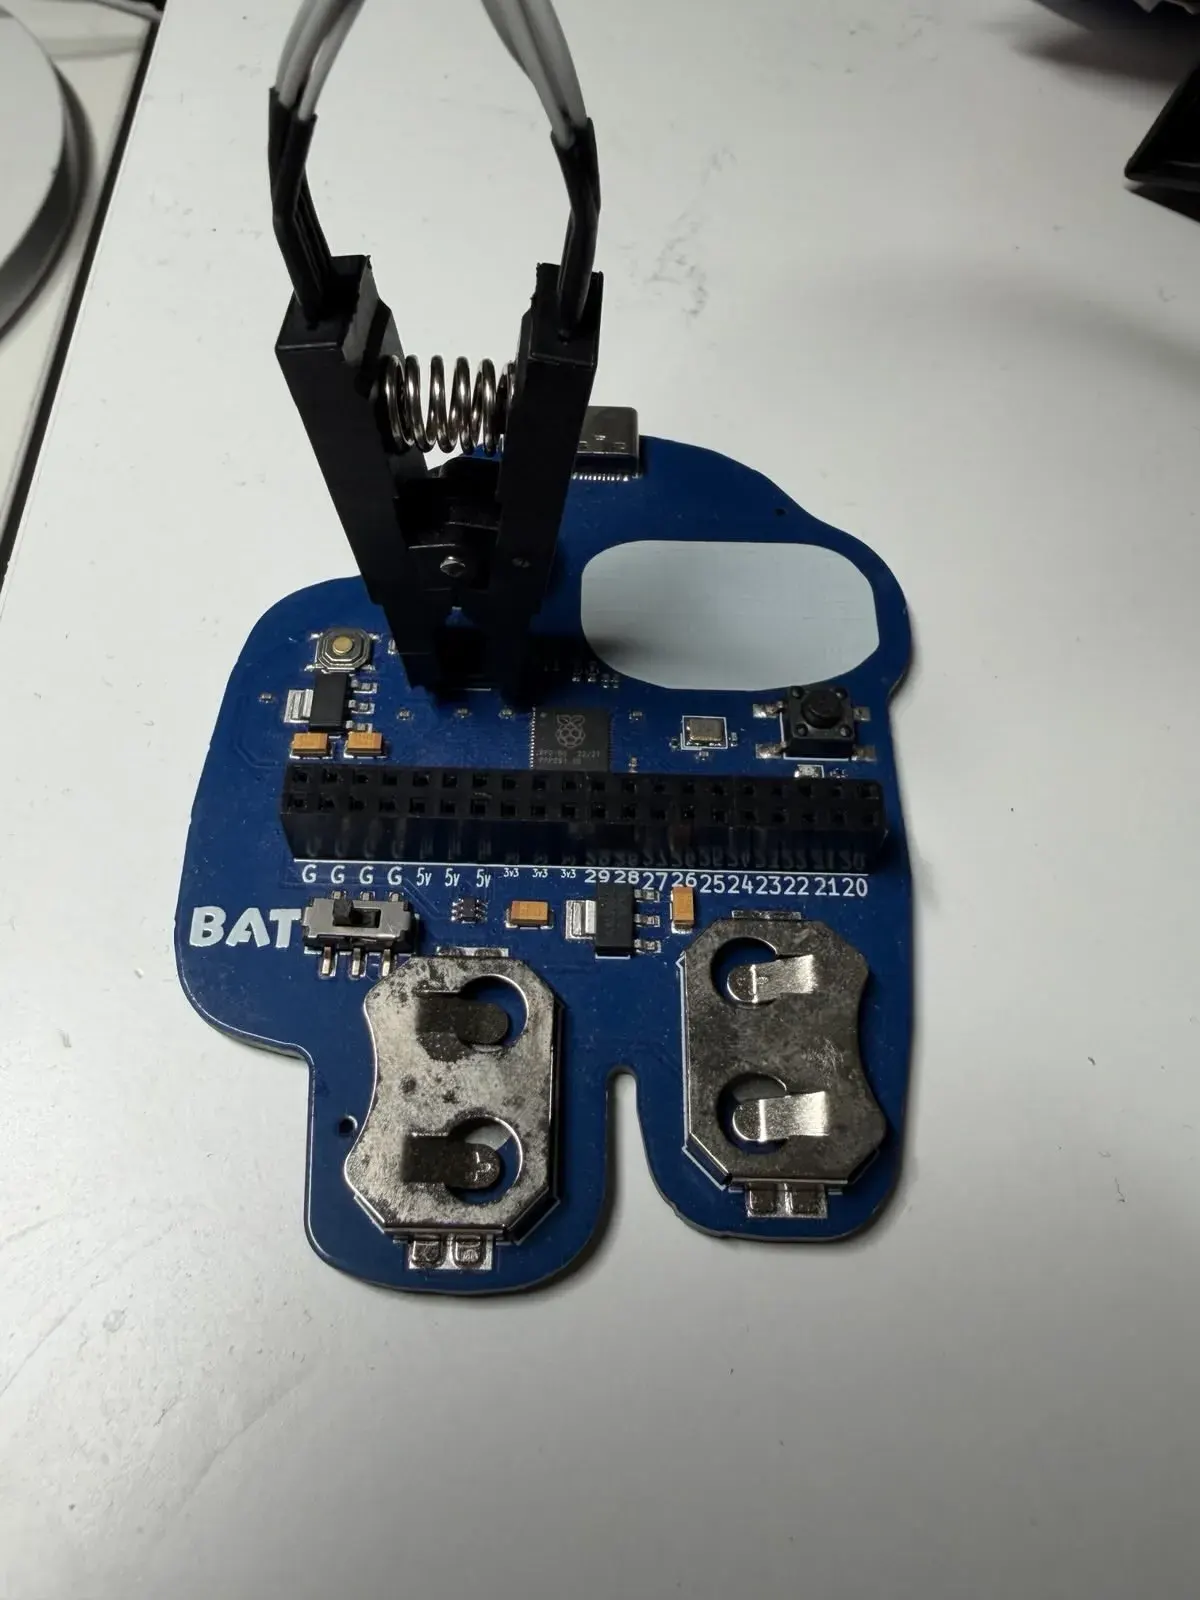
Interfacing with the flash chip is usually easiest with a SOIC-8 clip (or other clip for your specific package). The red wire demarcates pin #1, so the red wire should be aligned to the small dot on the IC package (also a marker for pin 1). Below is a demonstration of how the clip can be used. It can be quite finicky, so you might have to try it a few times for it to work. Make sure to turn off your laptop and disconnect it’s battery before you connect anything to it.
 Once you have verified that everything is connected properly with the correct voltage, plug in the programmer to your computer, and run this command (may require sudo).
flashrom -p ch341a_spi -r bios_dump.bin
This will dump the entire contents of the flash chip. It may take a few minutes, so give it some time. Once it’s done, the hard part is now over!
Decrypting the password
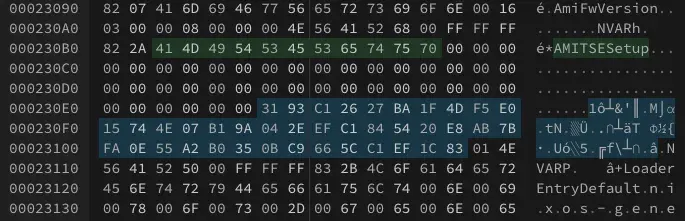
Open the dumped file in a hex editor of your choice. I would recommend hexed.it/ as it’s fully in the browser. Then search for the string AMITSESetup. There may be multiple occurrences of this string, so keep going until you find something that looks like this.
 You’ll see the string
 AMITSESetup, followed by an encrypted hex sequence, then ended by .NVAR. This 80-character hex string is your password but XOR encrypted. Luckily, the XOR encryption key used by many BIOSes has been cracked and widely distributed, and we can use that to decrypt our password.
Running an XOR operation using the following key and ciphertext:
Key: 5B93B62611BA6C4DC7E022747D07D89A332E8EC1E95444E89F7BFA0E55A2B0350BC9665CC1EF1C83
Ciphertext: 3193C12627BA1F4DF5E015744E07B19A042EEFC1845420E8AB7BFA0E55A2B0350BC9665CC1EF1C83
Results my password which is jw6s273i7amd4.
You can do all this in one click using this CyberChef recipe
Congratulations! You’ve cracked your BIOS password.
Now, there are other ways of doing this, like using an UEFI variable extractor, but this method is the fastest as it doesn’t require installing any additional software onto your computer.
If you were unable to decrypt the password
Search around to see if there is a different decryption key for your motherboard/BIOS. If you couldn’t find one, you might have to delete the password from the dumped image and then flash the modified image back onto your BIOS chip. You can also flash the stock image. Be aware that flashrom specifically warns not to use the utility to write data on flash ICs on laptops, as that may corrupt the BIOS and brick your machine. From what I’ve seen, you may have to desolder the flash IC in order to flash it, although that goes beyond the scope of this guide. Good luck!