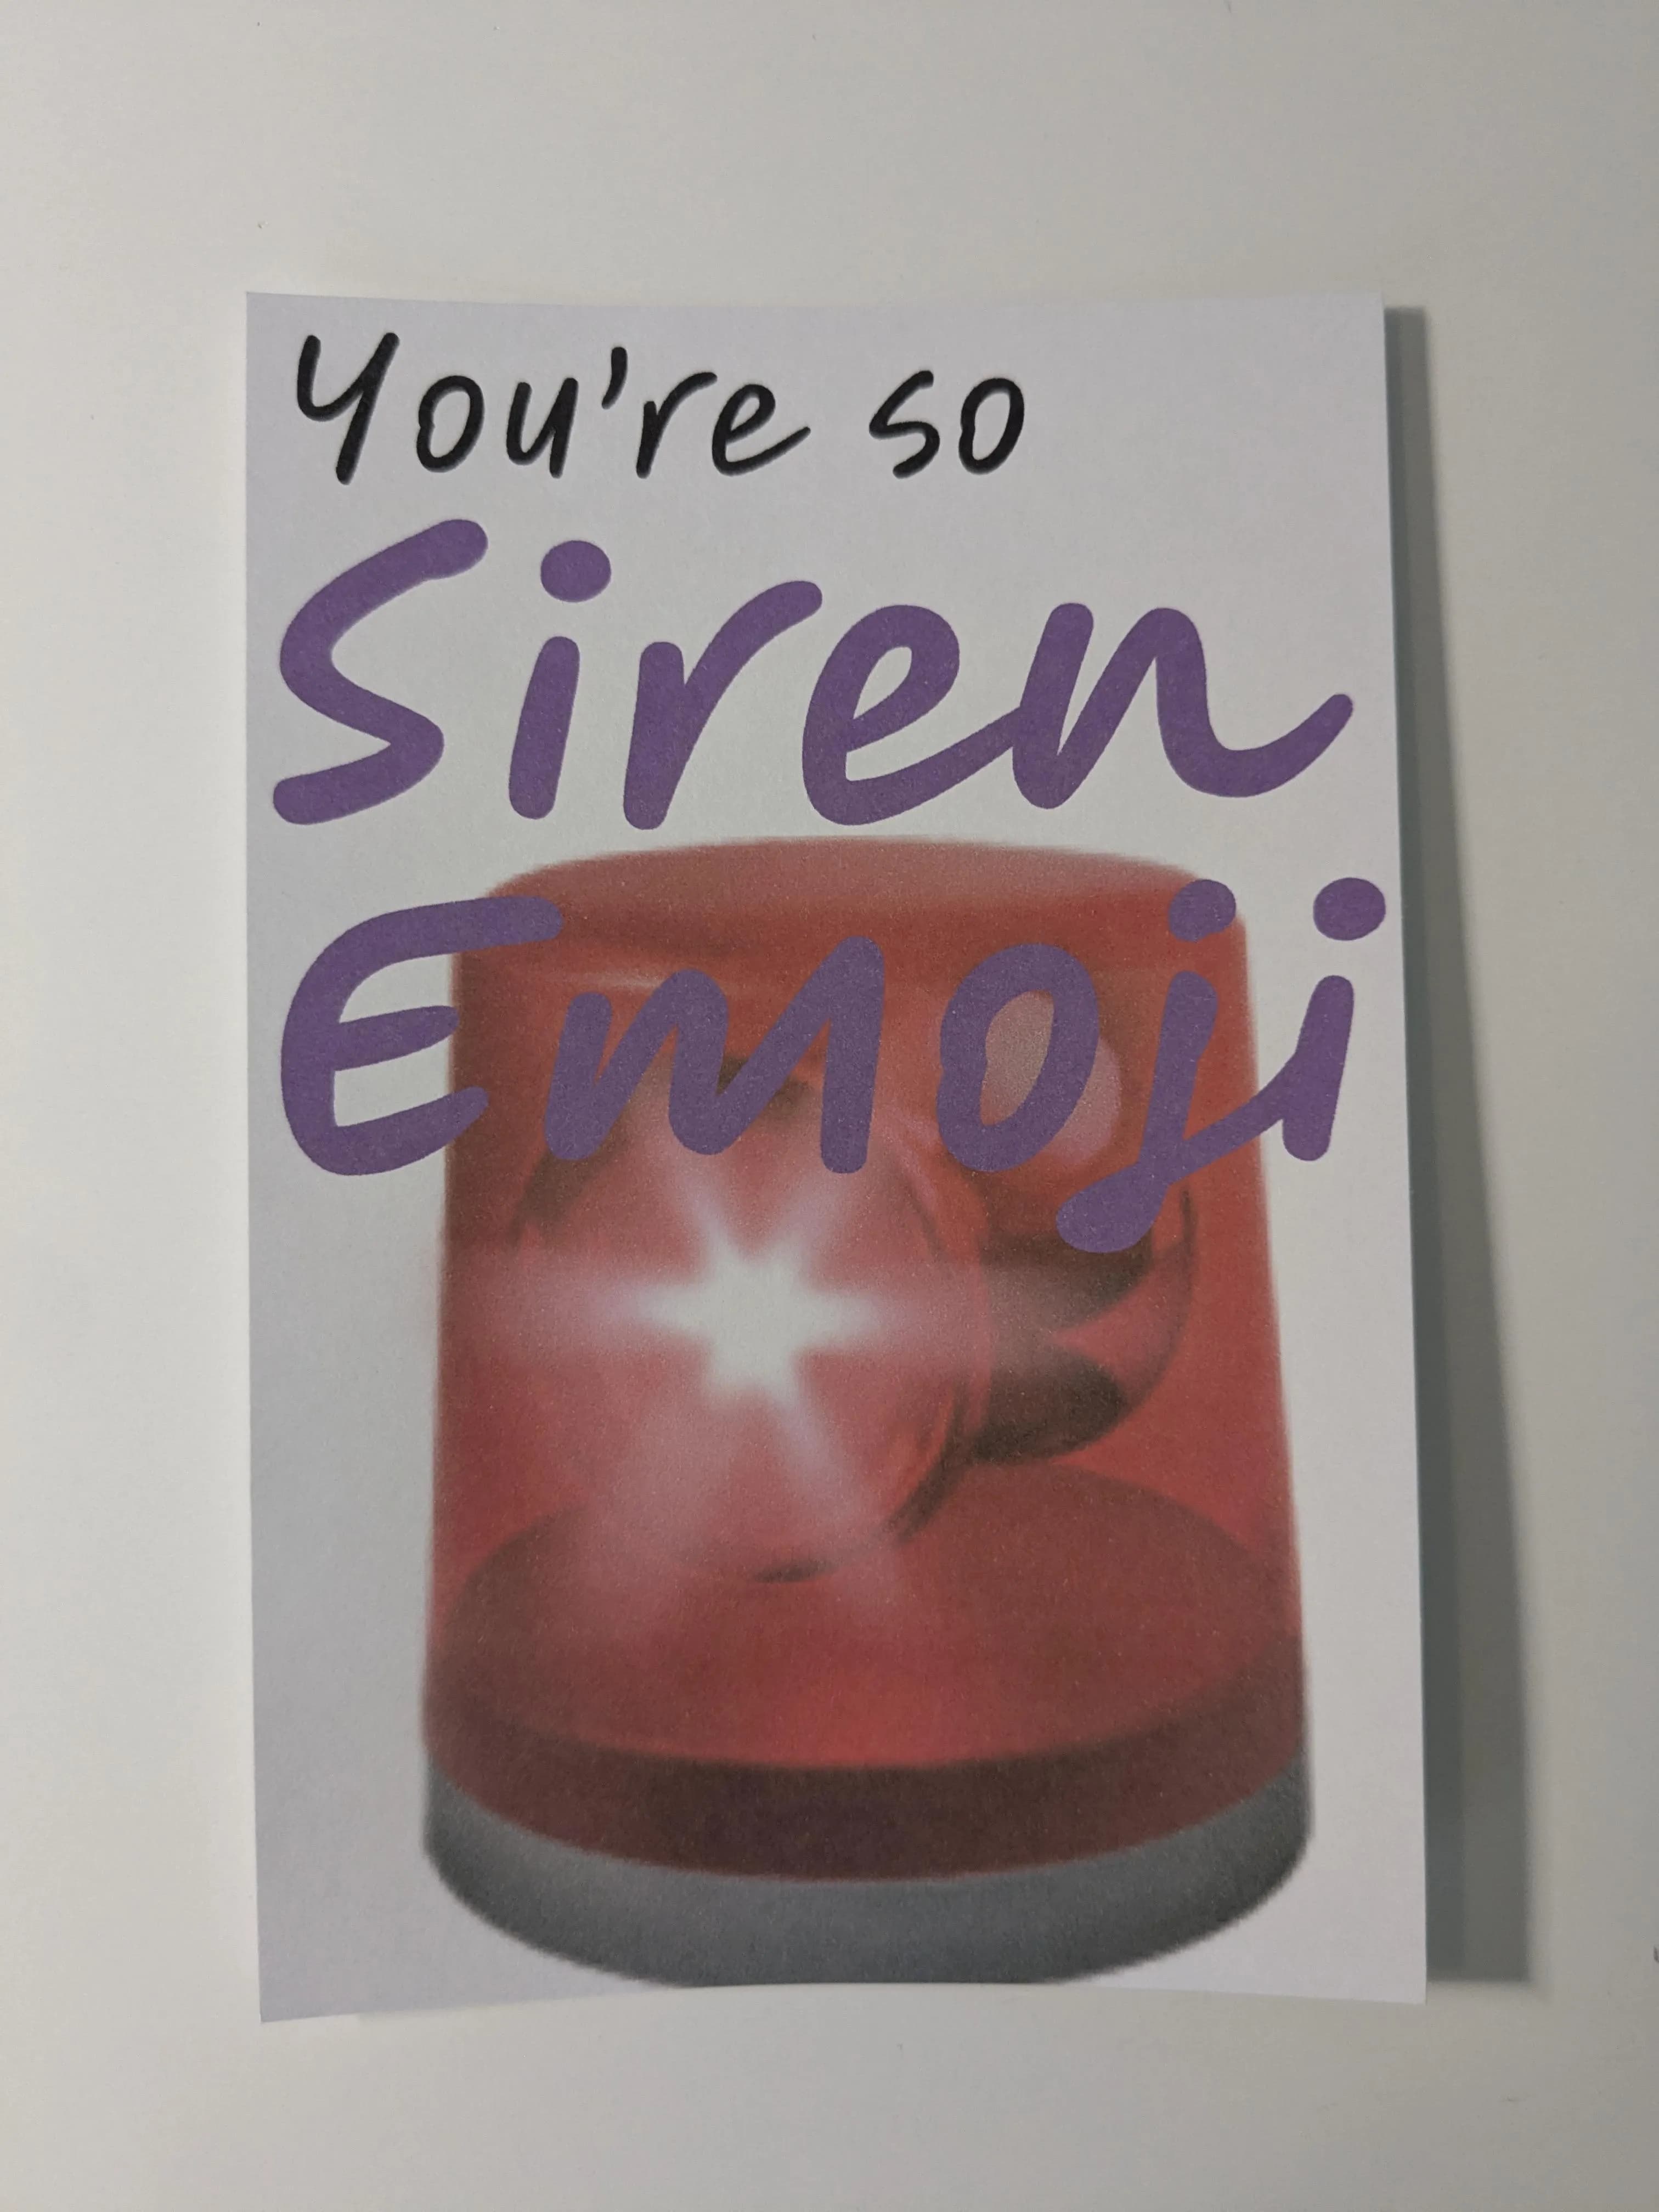
Recently, I remembered that postcards are a real thing. I’ve seen them around, often in souvenir shops, but I’ve never mailed one before. But a few weeks ago, I randomly felt like making some of my own.
Making the design
Making the design for the postcard was actually quite simple. I used a Figma extension called “Print for Figma” to make blank 6”x4” (152.4x101.6mm) cards. The front of your postcard can be anything you want, and the back follows the standard of having a stamp and an address (return addresses are optional).
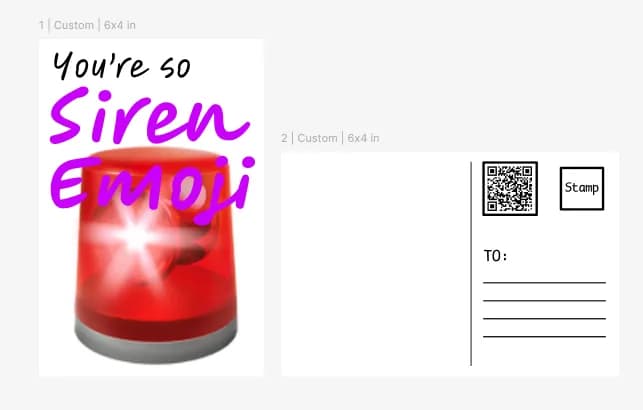
From here, it was pretty straightforward. I made my design and exported everything as PDF which I printed using a color inkjet printer.
Tracking QR Codes
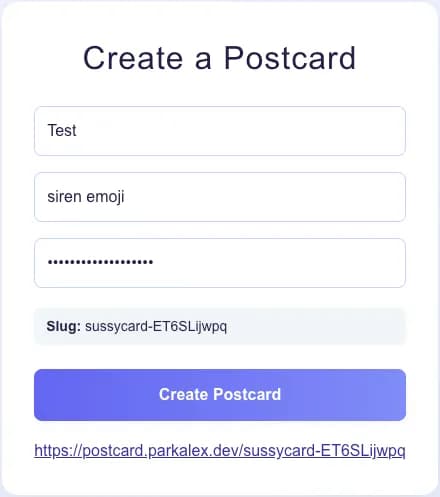
You might have noticed that on the back of the postcards, there is a QR code. I made a quick website that lets people click a button and send a notification letting me know that it has arrived. (Ignore the bad UI I made this in like an hour)
The page which lets me create postcard tracking links.
The page that people see when they scan the QR code.
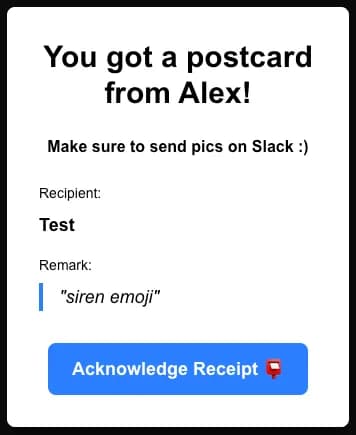
The notification I get on Slack when somebody presses the “Acknowledge Receipt” button.

Aftermath
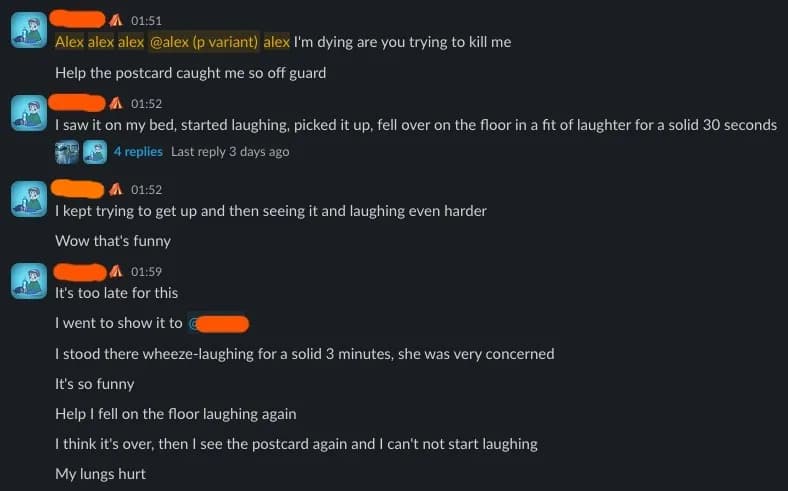
My postcards were a pretty big hit among my friends! I ended up mailing out around 7 postcards to my friends across the country. If school hadn’t ended, I probably would have handed out at least a couple to people at school as well.
One of my friends found the cards to be really really funny.
I definitely would recommend trying this yourself! Go onto Amazon or any other online store and buy postcard sized cardstock. I used 4”x6”, but you can use any size you want as long as it complies with USPS guidelines. Then you can print onto the paper any design you want and then mail it. If you’re on a budget, you can also glue paper with printed designs onto thin cardboard (think cereal boxes) and mail that.
Have fun :)
~ Alex